Stepwise Guide Of Conversion
Download Demo Version and follow straightforward instructions
Go to Start menu » Programs » Export Notes
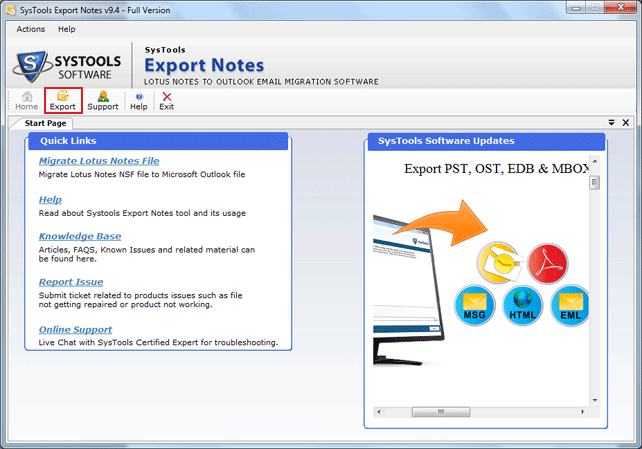
Click the "Export" option from the toolbar to begin the conversion process.
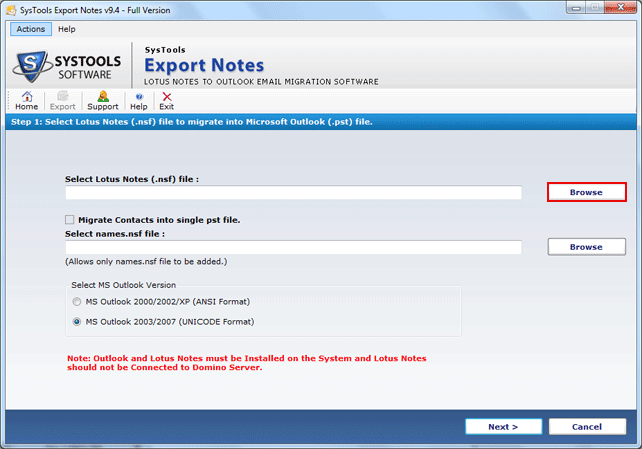
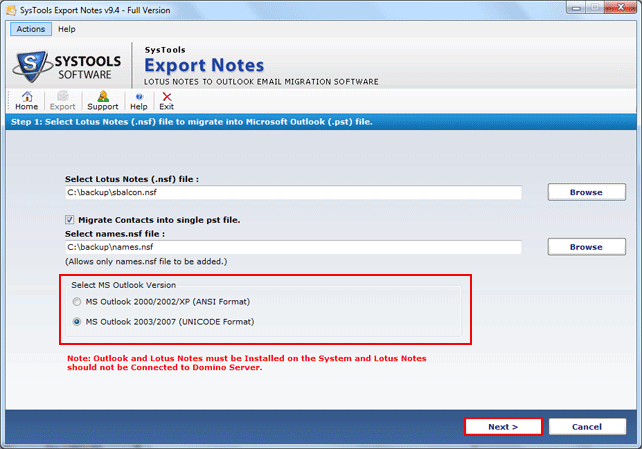
Click on highlighted "Browse" button and locate .nsf file from location.
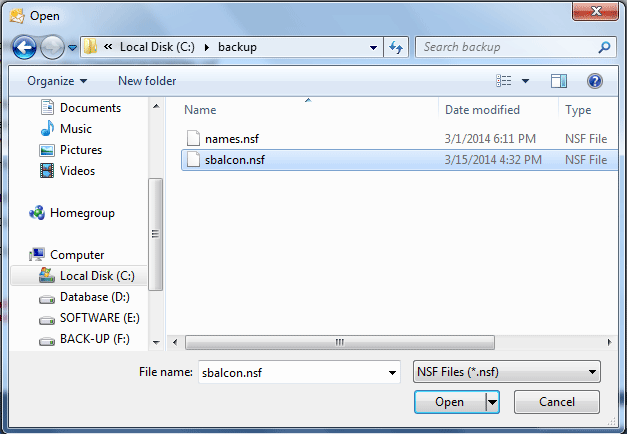
"Select" NSF File and Open It.
To convert contacts into separate PST File “Migrate Contacts into Single PST File”.
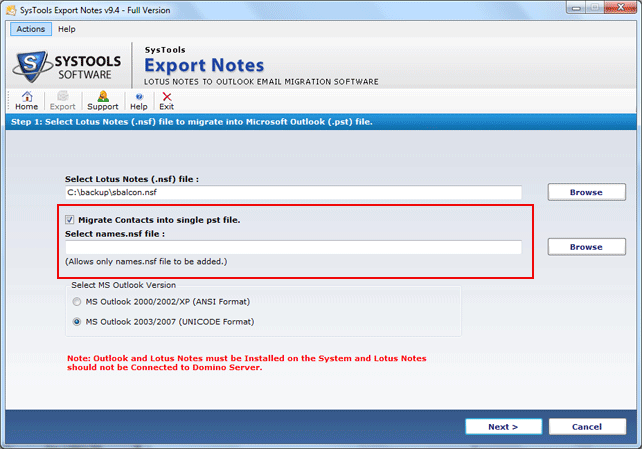
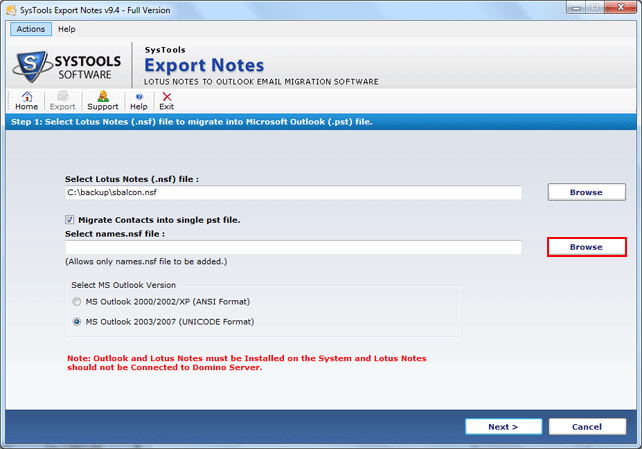
After that choose names.nsf file by clicking new "Browse" button.
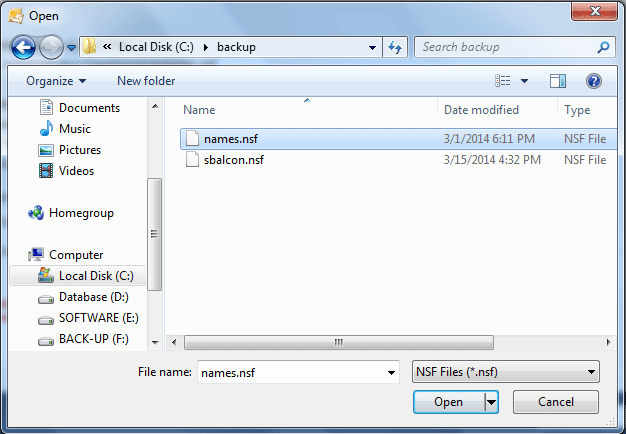
"Browse" and click open names.nsf file.
Following screen will showing names.nsf file location.
Following screen will showing names.nsf file location.
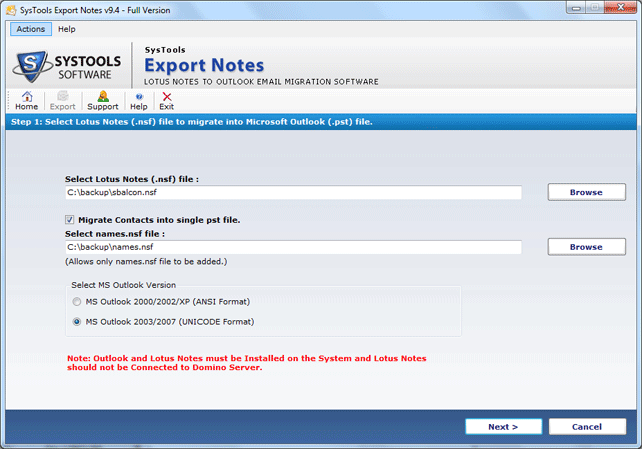
After selecting NSF File choose Outlook version ANSI/UNICODE formats to export.
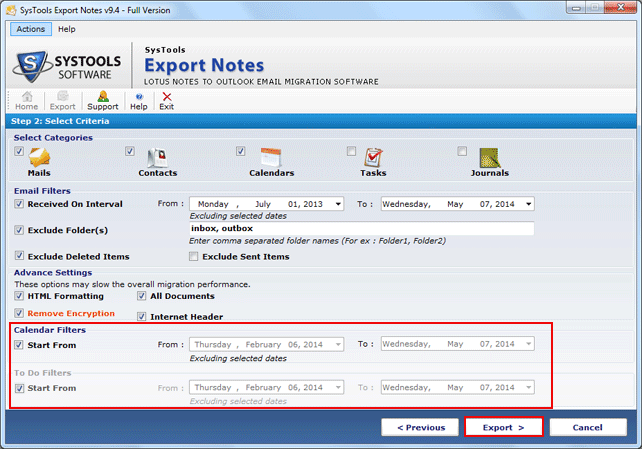
Carry on next step and select filters and advance setting for selective migration which speed up the whole process.
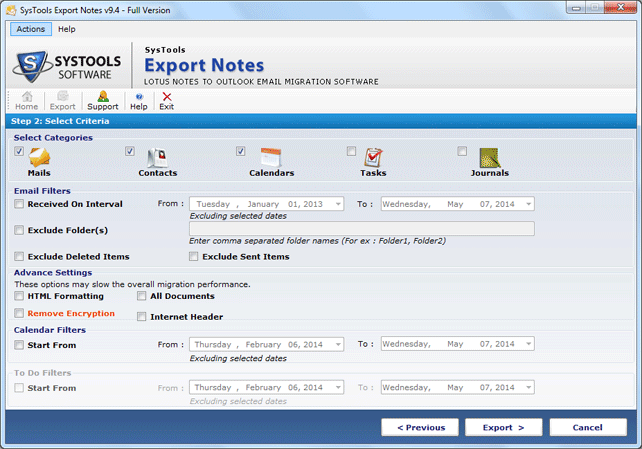
Select multiple categories such as emails, contacts, calendar, tasks, journals.

Apply filters as per your requirement to exclude folders, deleted items and exclude sent items.
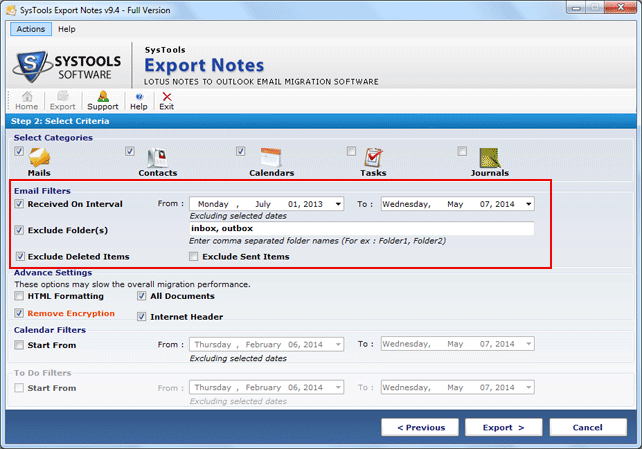
In next apply advance setting for HTML Formatting, All documents, Internet Header.

Choose Calendar filters and to do filters for specific date range.
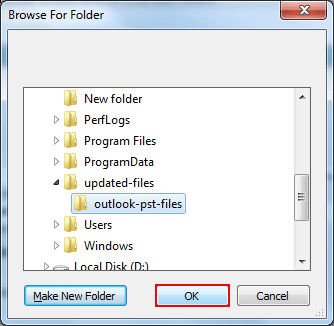
Now select saving location where you want to save the new PST files and click the OK button.
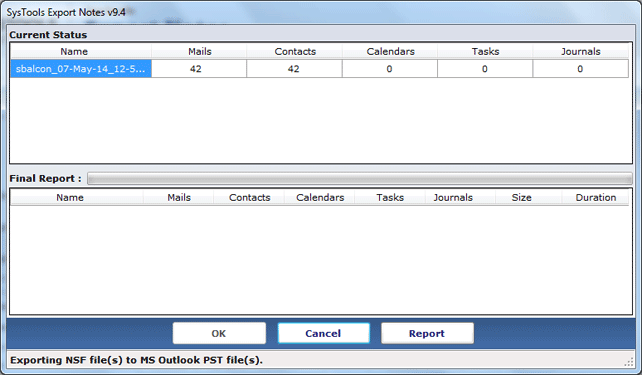
After selecting the location, conversion process will starts.
Get the final report in CSV format of migration process after completing conversion.
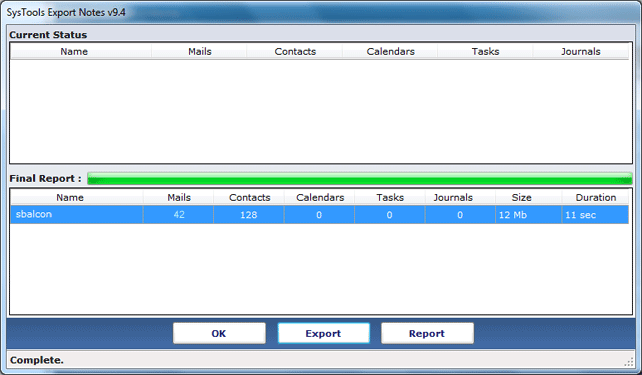
At last pop up window will appear and show, Items exported successfully.
